Dynamic DNS Setup
If you have no registered domain name
Domain Registration
In order to register a domain name, you need first to create an account on the RU-CENTER's website. To do this, click on "Sign contract" link in the right top corner of the website.

Further you should select a contract form (for individual or legal entity) and agree with the service delivery terms.
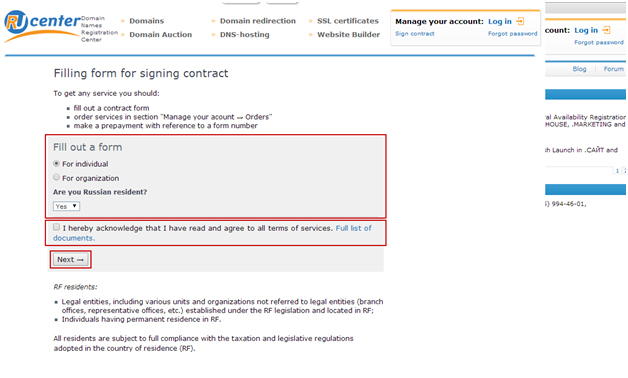
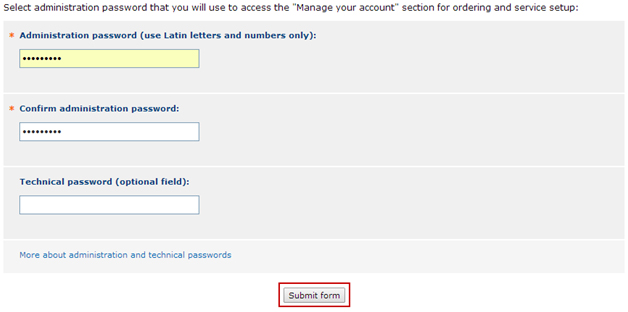
Then click on "Fill out a form". Fields marked with * are required fields. Input data should be authentic. After entering the required information click on "Submit form".
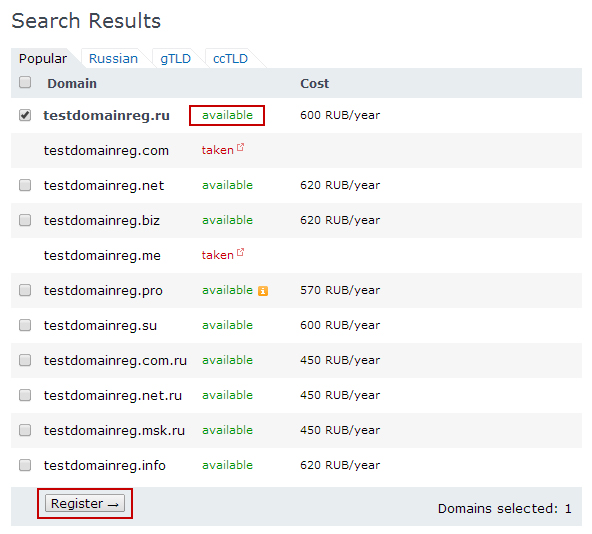
Upon successful registration on RU-CENTER's website you may initiate domain name registration. To do this, enter the domain name to be registered and click on "Check".

The system will display whether the domain name is available.
If the domain name is available, you may initiate a registration process by clicking "Register".
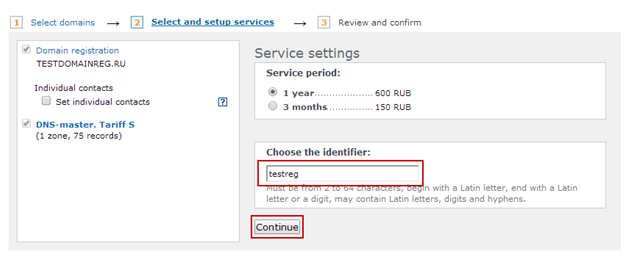
Within registration process you should immediately add DNS-master service, which will allow you to use dynamic DNS.
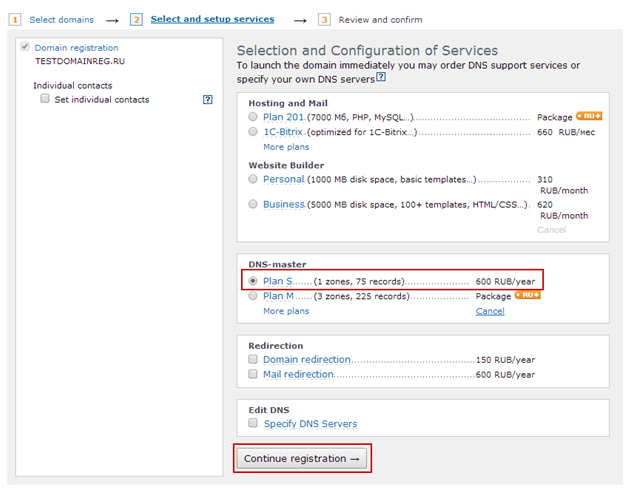
You need to choose a unique identifier (name) for this service, which will be displayed in your personal account, and click on "Continue".
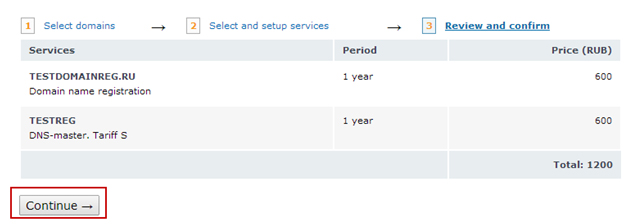
You should check the order details on the next page.
If all the data is correct, click on "Continue".
After that your order will be submitted for processing. If the funds on your personal account are sufficient to pay for the order, it will be executed immediately upon order submission. If the funds deposited on your personal account are insufficient to pay for the order, you will have to recharge balance, after that your order will be executed.
Collapse
Getting Data for Dynamic DNS
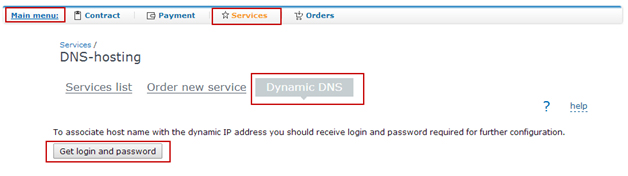
You need to get technical login and password for dynamic DNS functioning. To do that, you should go to "Manage your account" panel → "DNS-hosting" → "Dynamic DNS" at www.nic.ru and click on "Get login and password".
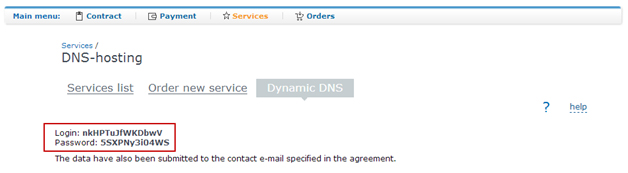
After that login and password, that are required for dynamic DNS setup, will be generated. The data will be submitted to the contact e-mail address specified in your agreement.
Attention! After a new request, previously generated username and password will become invalid. You will have to reconfigure dynamic DNS with new login information.
Collapse
Adding Resource Record
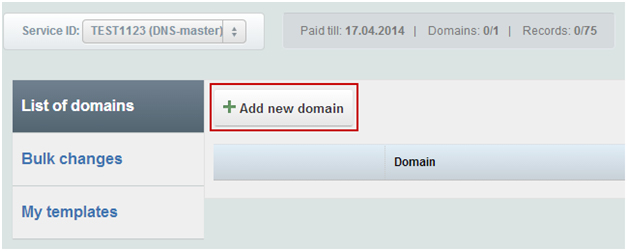
You need to add your registered domain to the list of domains managed by DNS-master.
Select the identifier, which you have entered when ordering DNS-master service, via the interface.
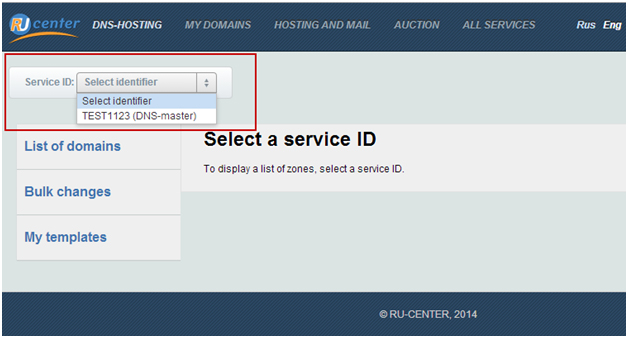
Then click on "Add new domain".
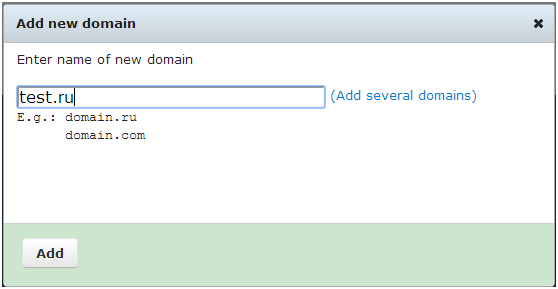
In the appeared window specify your domain name and click on "Add".
If successful, the following message displays:
"Allow zone transfer to our server zen.nic.ru (194.85.61.60) in order to import records.
If DNS server refuses to transfer zone, only the standard records will be imported."
After the domain has been added, select it in the list.
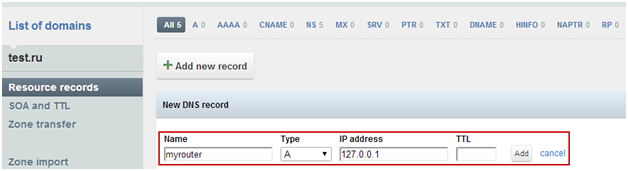
Then click on "Add new record".

Then, fill out the form:

- Name — name (subdomain of your domain) for addressing to a device. You can fill it by one of the following methods:
- If you want to address to the Internet center without the use of subdomain, but using domain name only (test.ru), set this field to "@".
- If you want to address to the Internet center using special name (e.g. myrouter.test.ru), you should create a subdomain "myrouter" for your domain by specifying it in the Name field.
- Type — type of resource record, select "A" type in such case.
- IP address — enter 127.0.0.1.
Then, you should click on "Add" and "Upload zone":

Note! If the following message displays, when you are choosing a domain name:

it means that domain delegation process is not complete yet. It usually takes up to 24 hours.
Collapse
Hardware Configuration
You should configure your hardware via the existing Administrator Panel using the received data:
- Domain name - the fully qualified domain name, for which A
record with IP address 127.0.0.1 is created within DNS-master, e.g.
myrouter.test.ru
- Username, password – data obtained in section 2.2
- Select DNS-master as a service provider.
Follow Administrator Panel Guide on the website of your hardware manufacturer.
Collapse
If you have a domain name
If you already have a registered domain name, you can use it to configure dynamic DNS.
DNS-master Service Order
DNS-master activation is required for dynamic DNS functioning. Follow the link, choose a plan and enter a unique identifier (name) for the service, which will be displayed in your personal account.
Dynamic DNS is supported on all plans of the DNS-master service, which differ in a number of added domains and resource records.
If you are going to use dynamic DNS for 1 domain and the number of resource records will not exceed 75, S plan is the best choice for you.
Collapse
Getting Data for Dynamic DNS
You need to get technical login and password for dynamic DNS functioning. To do that, you should go to "Manage your account" panel → "DNS-hosting" → "Dynamic DNS" at www.nic.ru and click on "Get login and password".

After that login and password, that are required for dynamic DNS setup, will be generated. The data will be submitted to the contact e-mail address specified in your agreement.

Attention! After a new request, previously generated username and password will become invalid. You will have to reconfigure dynamic DNS with new login information.
Collapse
Domain Delegation on RU-CENTER’s DNS Servers
If your domain name is not used to access websites and other resources
If your domain name has never been used to access websites and other resources, you are required to delegate it to RU-CENTER’s DNS servers.
To delegate a domain, you should go to your registrar panel, find the section where you can manage DNS servers and specify the following list of DNS servers.
To find out the registrar of your domain, please proceed to WHOIS service:
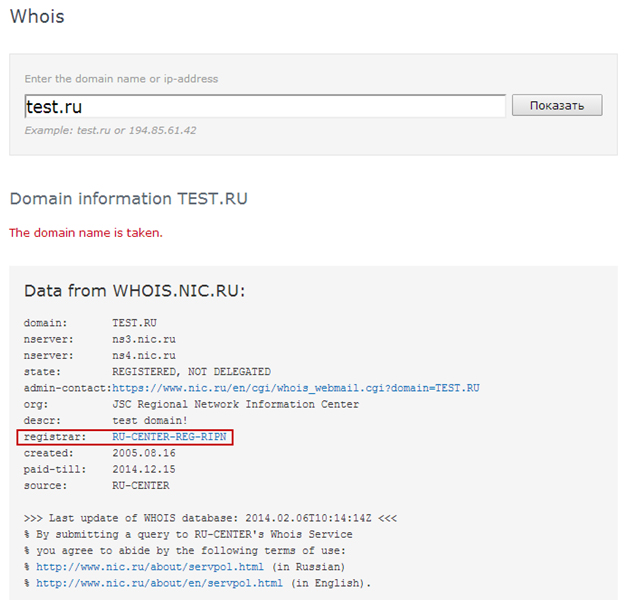
In such case RU-CENTER is the registrar of the domain name. See instructions for delegation of domain names registered with RU-CENTER.
Note! During domain delegation process the previous data will be rerecorded in the TLD Registry. This process may take up to one day.
If your domain name is used to access websites and other resources
Attention! You should be absolutely sure of what you are doing. If your actions are wrong, all the resources and websites under this domain may become unavailable!
In your hosting provider panel create a subdomain of your domain. Then you should delegate the subdomain on RU-CENTER’s DNS servers. Find the section for DNS records management in your hosting provider panel and add the NS records for the subdomain by specifying the following DNS servers.
Collapse
Adding Resource Record
You need to add your registered domain to the list of domains managed by DNS-master.
Select the identifier, which you have entered when ordering DNS-master service via the interface.

Then click on "Add new domain".

In the appeared window specify your domain name and click on "Add".

If successful, the following message displays:
"Allow zone transfer to our server zen.nic.ru (194.85.61.60) in order to import records.
If DNS server refuses to transfer zone, only the standard records will be imported. "
After the domain has been added, select it in the list.
Then, click on "Add new record".

Then, fill out the form:.
- Name — name (subdomain of your domain) for addressing to a device. If you want to address to the Internet centre using domain zone that you have created (e.g. myrouter.test.ru), set this field to "@".
- Type — type of resource record, select "A" type in such case.
- IP address — enter 127.0.0.1.
Then, you should click on "Add" and "Upload zone".
Note! If the following message displays, when you are choosing a domain name:
it means that domain delegation process is not complete yet. You have to wait for the delegation process completion, which may last up to a day, or verify correctness of the specified DNS servers.
Collapse
Hardware Configuration
You should configure your hardware via the existing Administrator Panel using the received data:
- Domain name - the fully qualified domain name, for which A
record with IP address 127.0.0.1 is created within DNS-master, e.g.
myrouter.test.ru
- Username, password – data obtained in section 2.2
- Select DNS-master as a service provider.
Follow Administrator Panel Guide on the website of your hardware manufacturer.
Collapse
